Subject
- #Environment Settings
- #Arduino IDE
- #Arduino
- #Dark Theme
Created: 2024-06-11
Created: 2024-06-11 01:22
The default Arduino IDE has the advantage of being compact, but it lacks readability, leading to decreased productivity. Even with slightly complex code, it becomes difficult to use. This post provides instructions for setting up the Arduino IDE to enhance programming productivity. Please note that these settings are based on personal preferences and are for reference only. They are not mandatory.
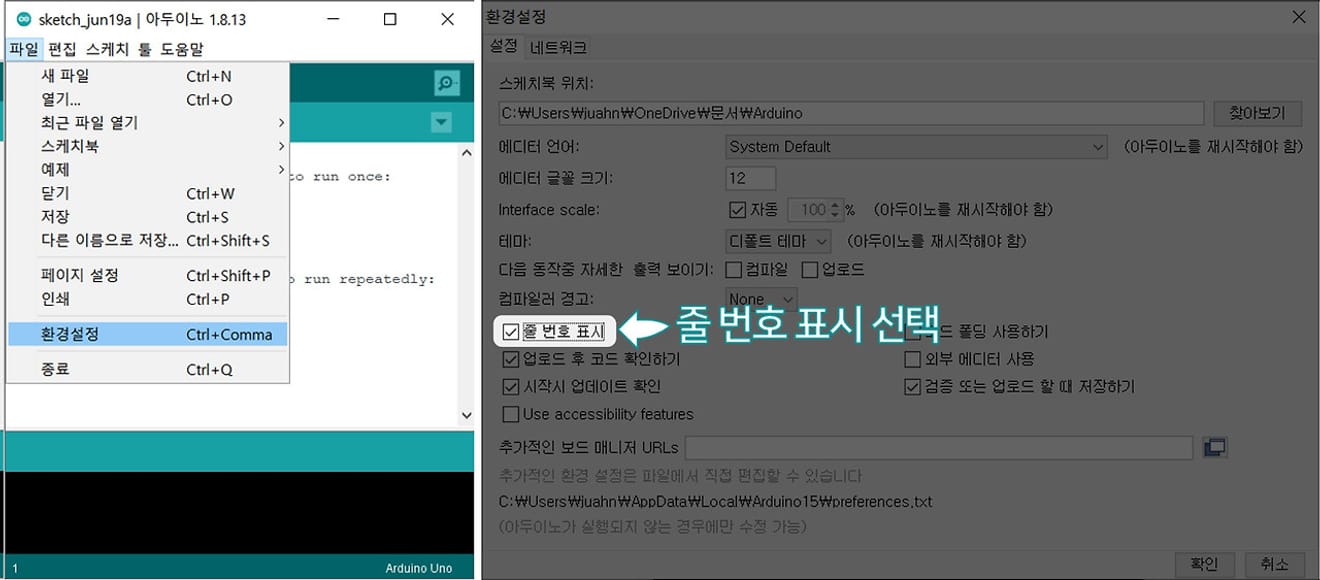
Arduino IDE Line Number Display Setting
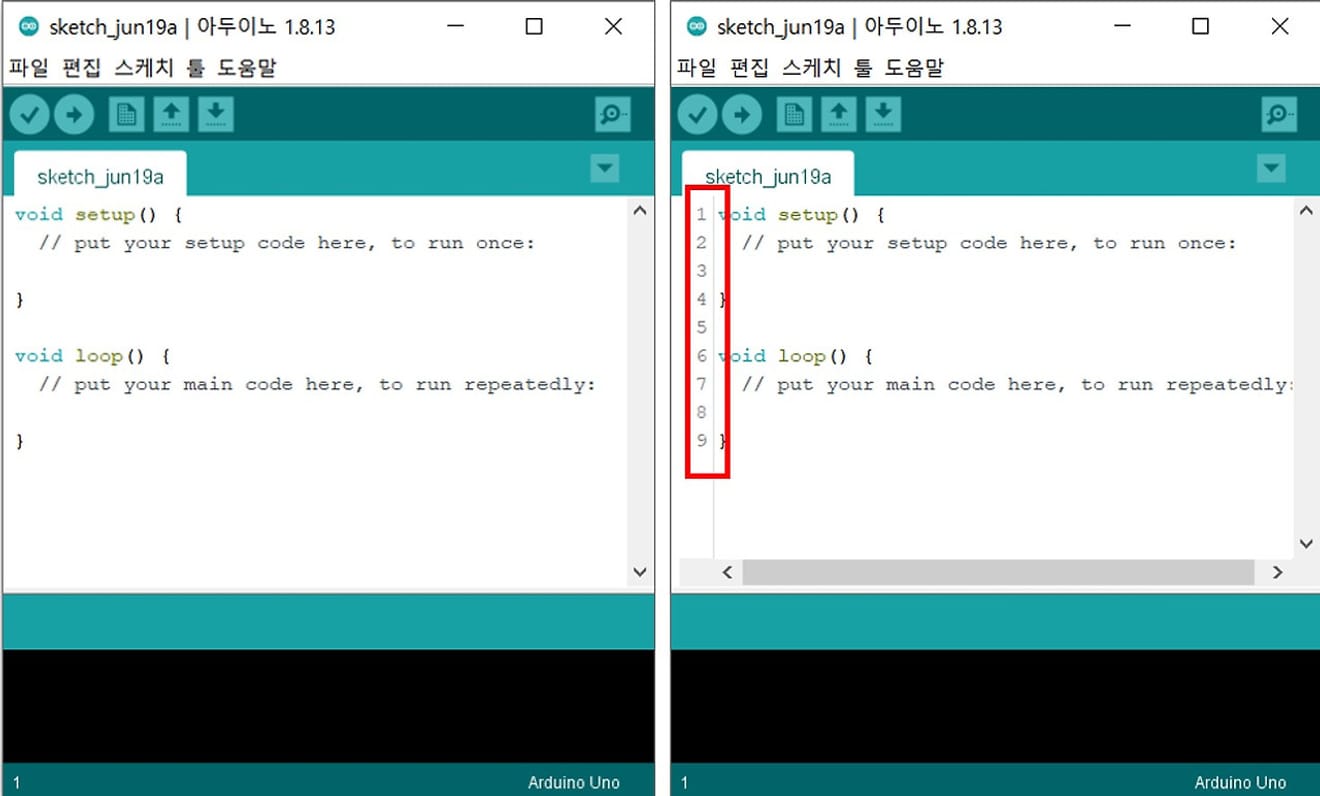
Comparison Before/After Line Number Setting
Arduino IDE Line Number
As the code becomes more complex, it can be difficult to determine where an error occurred during compilation. By clicking "Show verbose output during compilation", it is easier to check at which point the error occurred.
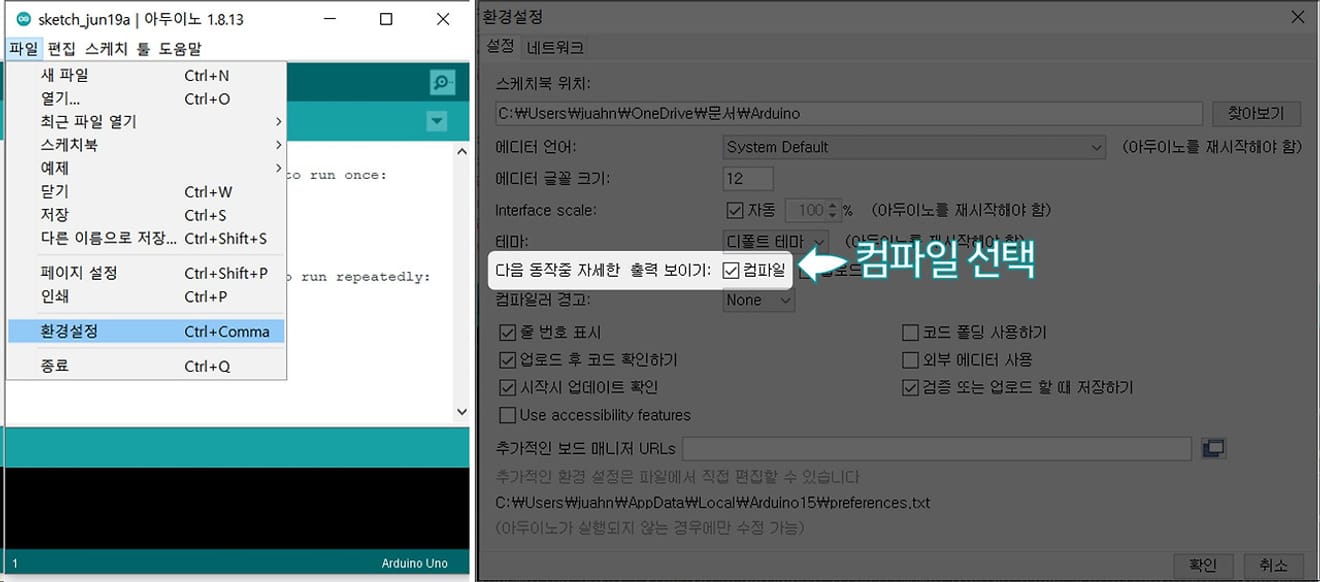
Arduino Compile Detailed Output Display Setting
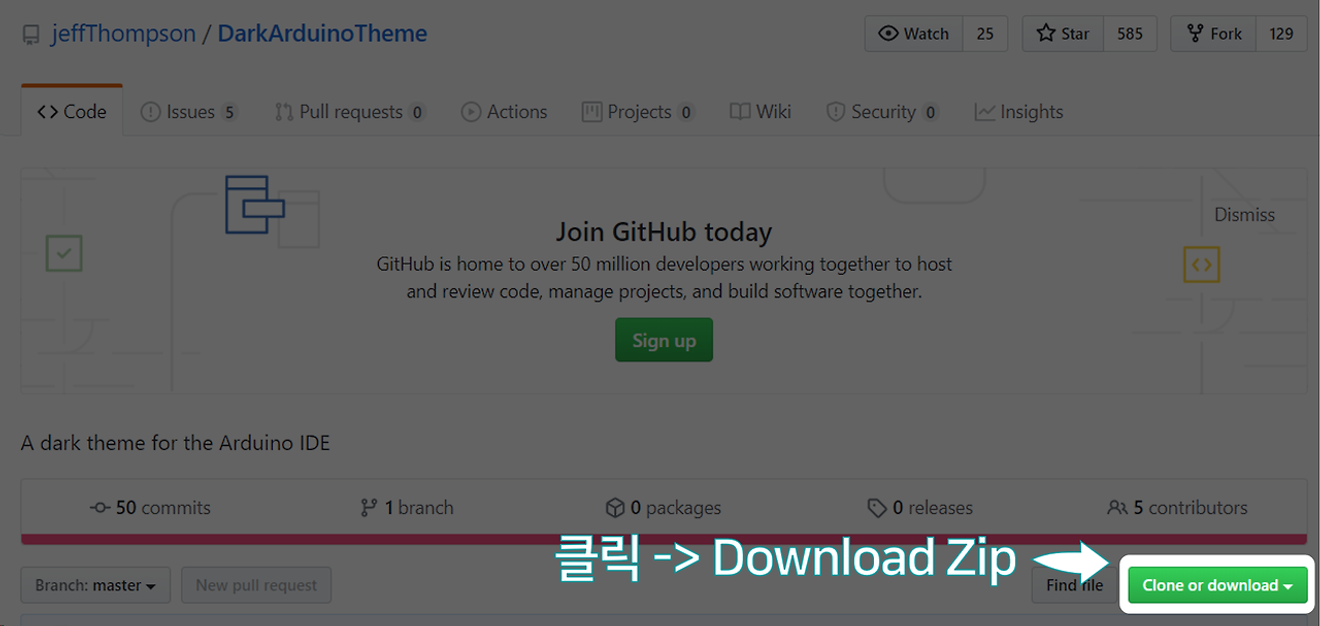
1. Dark Theme Download Path - Click
2. Download the theme file from the Dark Theme download path.
3. Extract the downloaded file: The 'theme' folder is the folder that will be moved to the Arduino installation file folder.
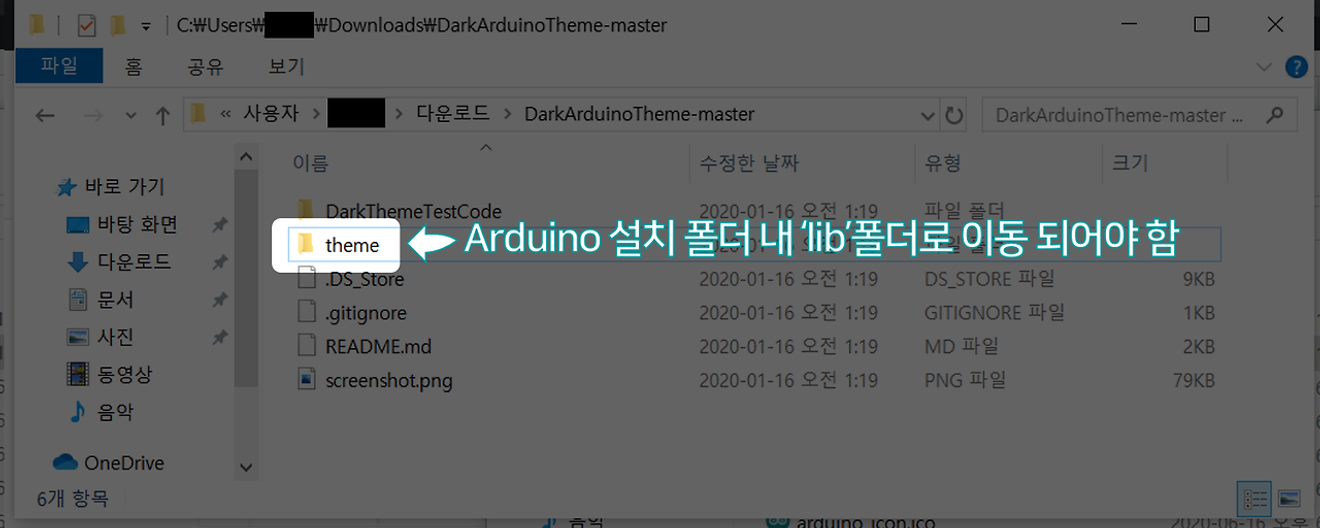
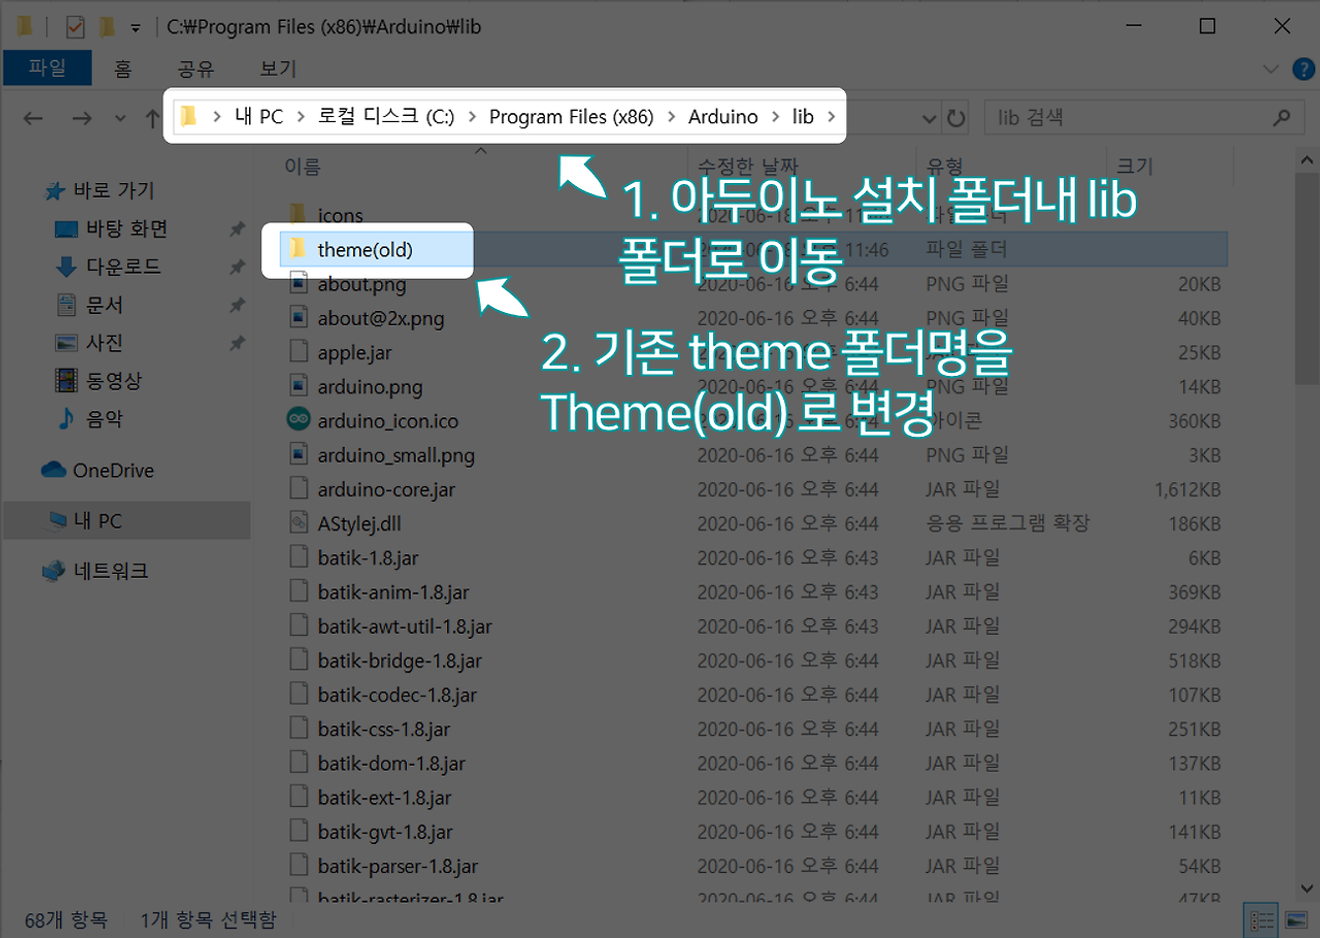
4. Navigate to the lib folder within the Arduino installation folder. In my case, the path is C:\Program Files (x86)\Arduino\lib.
5. Rename the existing theme folder within the lib folder to theme(old).
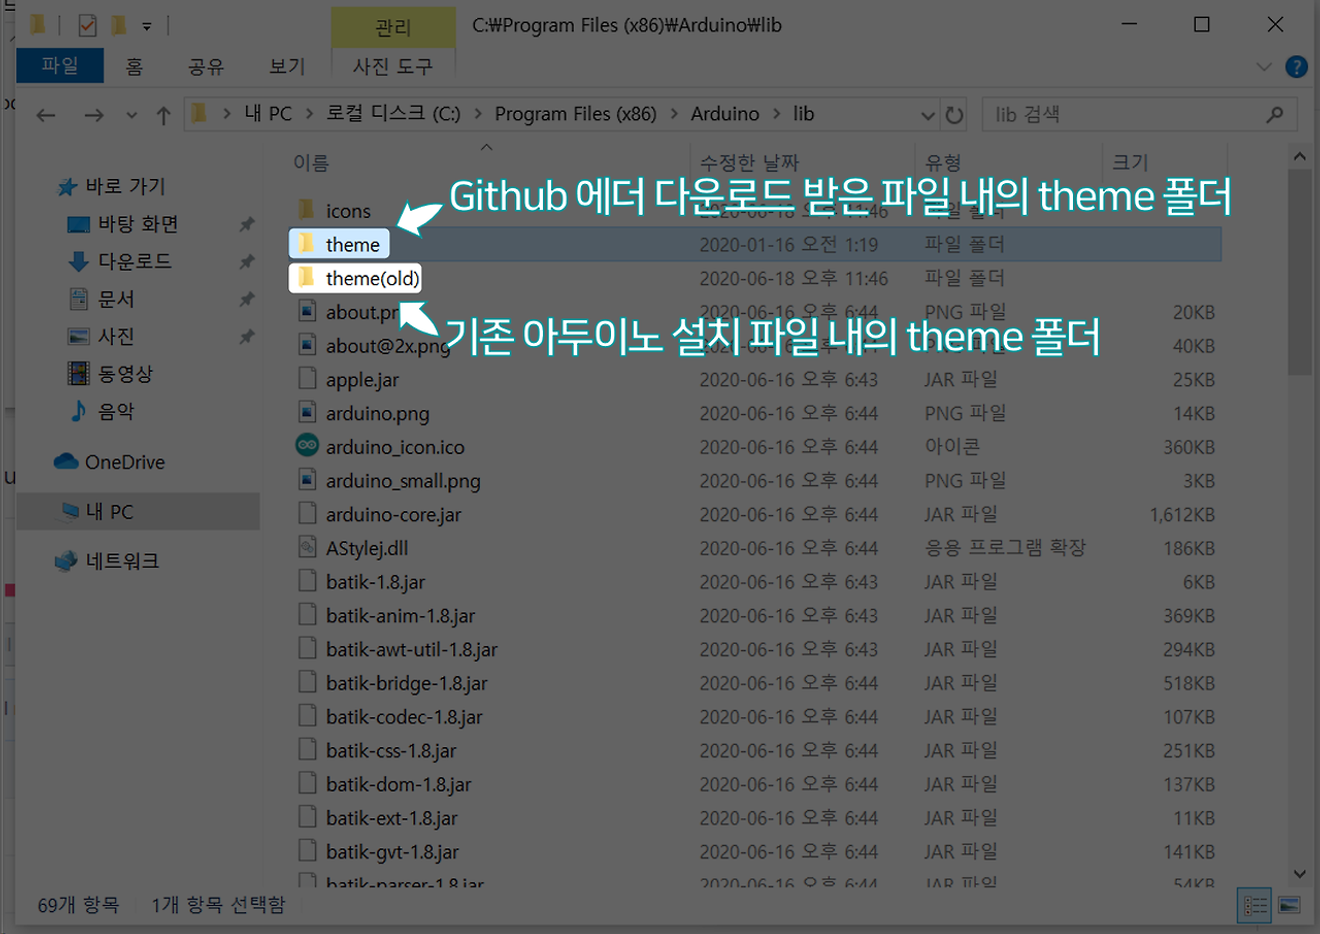
6. Move the theme folder downloaded from Github to the lib folder mentioned above.
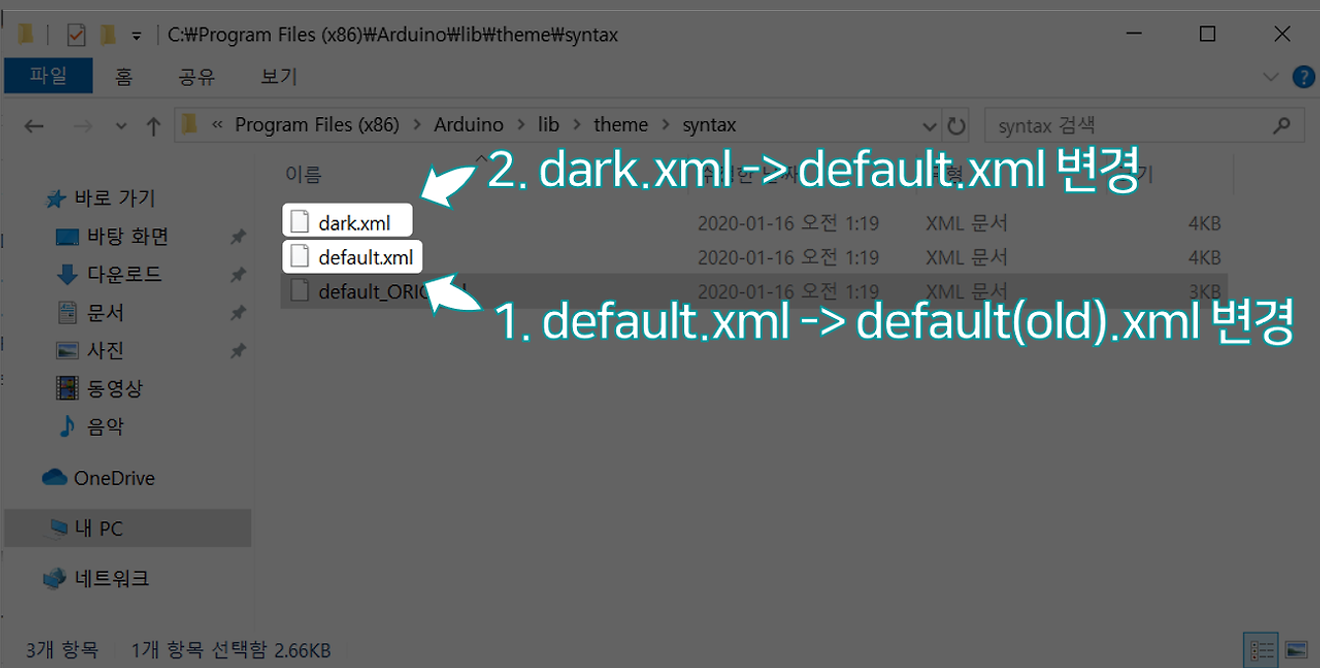
7. Within the syntax folder of the copied theme folder, rename the files as shown in the image below.
1. Rename default.xml to default_old.xml
2. Rename dark.xml to default.xml
8. When you run the Arduino IDE, you will see the Dark Theme applied as shown below.

Arduino IDE Dark Theme
We will set the following detailed settings.
Before performing the following settings, close the Arduino program and install the font you want to use before proceeding.
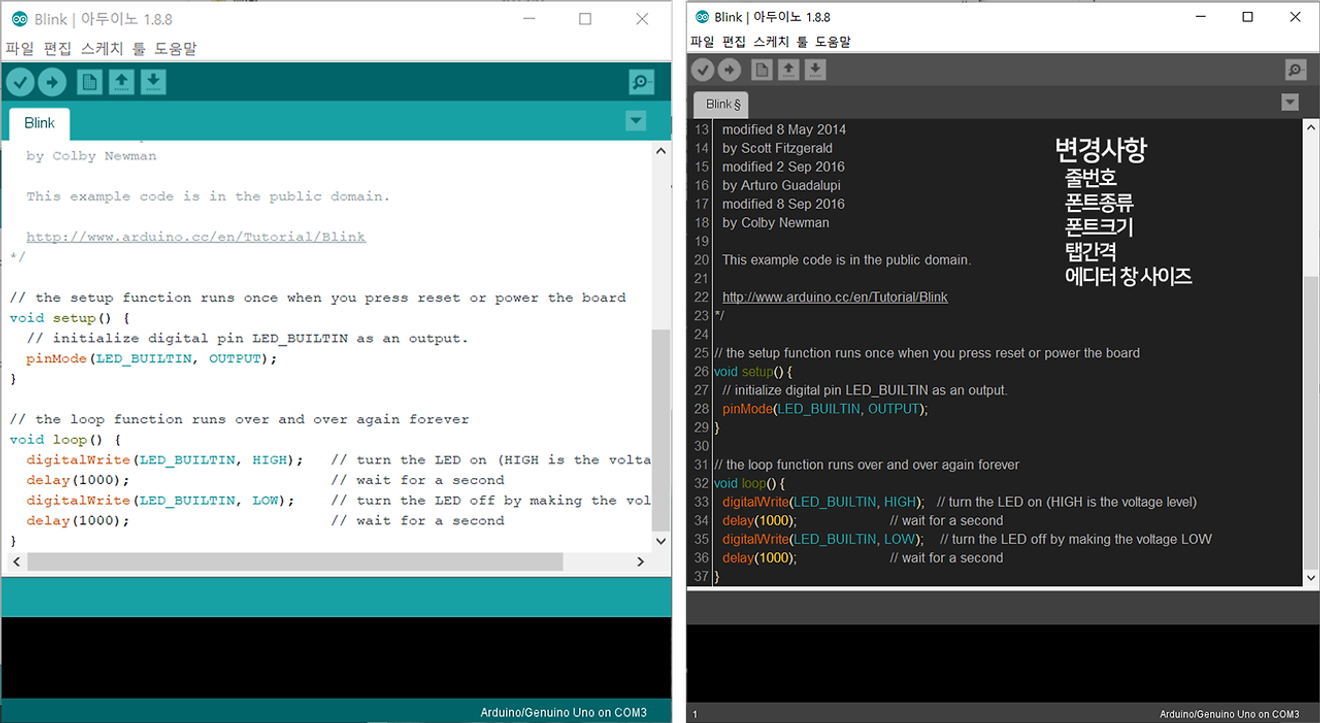
Environment Settings Change Before and After Comparison
Thank you for reading until the end. 😊
1. D2Coding font download: https://github.com/naver/d2codingfont
April 6, 2024
November 17, 2024
November 23, 2024
July 8, 2024
August 23, 2024
May 7, 2024
Comments0